
Adventures in Podcasting: How I got it started. I started recently getting into podcasting and researching how to go about putting one together. This blog post goes into some of the specific steps I have taken to do just that.
What Gear did I need?
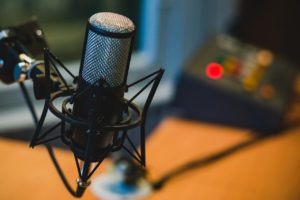
When I started looking into things, one of the first steps that I needed to take was to look for podcasting gear. What equipment did I need in order to start a podcast? To begin with, I looked into what I would need if I wanted to have a podcast with two people because I want to be a have guest. Getting gear for a podcast of two is different from having that one. If you want to put a podcast together where it’s just going be you, you can get a microphone, plug it into your computer with a USB cable and you’re off and running.
If you want to do a podcast where you plan to have a guest, you are going to need different equipment. What I found was that the first things that I needed were a mixer with XLR inputs, an XLR microphone and headphones. For the microphone and headphones, you would need a set of two, one for you and one for your guest… pretty straight forward as to why. When I looked into this I found a good deal on Amazon where I was able to get a podcast bundle for two which included the mixer, two XLR microphones and two headphones for about $250 bucks, not a bad deal.
What software did I need?
The next thing that I looked into after getting the equipment had to do with software I needed. The first thing was recording software. There are many options for this, I use Zencastr. Zencartr is SAAS based podcasting software you can use to record your podcast in hi-def. It’s really easy to use and it’s free, so that’s nice. You will also need is some form of post-production software. I use Auphonic for this purpose. Once you record your podcast you upload the recording to Auphonic. For lack of a better term, Auphonic will run the recording ‘through the wash’. It gets rid of a lot of background noise and automatically adjusts volume levels basically cleaning up the audio file and making the recording audience ready. Auphonic is also a free software service up to a certain amount of recorded time.
One thing about Auphonic that I like is that it allows for transcription services. This means the software will take all the verbiage from the audio and turn it into text so you can create a written document out of your podcast. From a content standpoint, what you can do with the transcription is include it in your podcast show notes so that people can go back and read though. You can also take that content and turn it into a blog post. Transcribed podcast audio is the basis for this blog post you are reading now. You just take the natural language transcription, put it into a word doc, clean up the grammatical and spelling errors and boom, you get yourself a nice blog post that is repurposed from the podcast.
My next blog on this subject will get into setting up YouTube channels, using video content and how to apply it to different platforms like LinkedIn, so stay tuned for that. In the meantime, if you would like to subscribe to the podcast or check out the how-to videos I have created on this subject, check out the following links.
Youtube channel: https://bit.ly/3cse5zr
Podcast home page: https://natetalksbizness.transistor.fm/